
DISCOUNTED EDUCATION PRICING! CALL 1-877-891-8411. We Gladly Accept School Purchase Orders!
Choosing the right school poster printer in 2026 is one of the smartest investments a K-12 school or district can make. With education budgets under constant pressure and the demand for engaging, visual learning materials at an all-time high, an in-house poster printer can save thousands of dollars annually in outsourcing costs while transforming how teachers create and deliver instruction. This comprehensive buyer’s guide—fully updated for 2026—breaks down everything educators, administrators, and procurement teams need to know: the real benefits, critical features, top-performing models, and practical advice for successful implementation and why The Education Graphics Poster Maker is the #1 choice for schools in 2026
Whether you’re outfitting a single media center, supporting multiple classrooms, or rolling out district-wide solutions, the right wide-format school poster printer empowers teachers to produce professional- quality anchor charts, STEM infographics, SEL and PBIS signage, hallway displays, event banners, safety posters, student showcases, and more—on demand and at a fraction of the cost of commercial print shops.
The Education Graphics Poster Maker stands out as the clear leader in 2026 because it was purpose-built for education.
The education landscape has shifted dramatically. Post-pandemic, schools emphasize personalized learning, project-based instruction, and visual scaffolding to support diverse learners. Teachers report spending hours creating materials or paying $15–$60 per outsourced poster, which delays instruction and strains budgets. A dedicated school poster printer solves this by enabling same-day production.
According to education technology trends in 2026, schools with in-house wide-format printing capabilities see up to 85% reduction in visual material costs and significantly higher teacher satisfaction. Students respond better to vibrant, customized visuals—studies show improved retention rates of 20-30% when complex concepts are supported by high-quality charts and diagrams. From elementary reading walls to high school science labs, large-format printing supports differentiated instruction, inclusion, and school pride.
Additionally, with growing focus on school safety, equity, and mental health, quick production of PBIS matrices, growth mindset posters, and emergency signage has become essential. Districts that invest in the right technology report faster response times to events, better parent communication through custom banners, and stronger community engagement.
Key Features For The Best School Poster Printers In 2026
When evaluating the best school poster printers, teachers must look beyond basic specs. Here’s what actually drives success in real educational settings:
The best school poster printers offer seamless integration with tools teachers already use daily—Canva for Education, Google Slides, Google Workspace, and Microsoft PowerPoint. Pre-loaded K-12 templates for every subject (math strategies, science cycles, historical timelines, literacy strategies) eliminate design time. Look for drag-and-drop interfaces with auto-resizing, spell- check, and one-click scaling from letter size to 24×36 inches or larger. In 2026, AI-assisted layout suggestions are becoming standard, helping non-designers create polished results in under five minutes.
24-inch models are ideal for most classroom posters and hallway displays. 36-inch and 44-inch options handle full banners, theater backdrops, and large event signage. The top systems support multiple media types: matte poster paper for everyday use, glossy for vibrant images, vinyl for durable outdoor or high-traffic signage, fabric for trade-show style displays, and recyclable options for sustainability-focused districts.
Pigment-based inks are non-negotiable. Unlike dye inks, pigments resist fading from sunlight and moisture—critical for posters displayed for months. Expect rich, accurate colors that make student work pop and professional-grade sharpness for text-heavy materials. 2026 models deliver resolutions up to 2400 dpi with excellent color gamut for photos, illustrations, and infographics.
Touchscreen interfaces, wireless and mobile printing (iOS/Android apps), and simple “scan-to- print” features are essential. Teachers should not need IT support for routine jobs. Systems with auto-nozzle checking and self-cleaning minimize downtime in busy environments.
Upfront price matters, but ongoing costs dominate. Target $1.30–$2.00 per standard 24×36-inch poster. Factor in ink cartridge yields, media costs, maintenance kits, and energy use. Avoid models with expensive proprietary supplies or frequent service calls. The best education bundles lock in predictable pricing for 2–3 years.
School environments involve dust, multiple users with varying skill levels, and tight schedules. Look for robust construction, automatic maintenance systems, and long duty cycles. Education- specific support—on-site training, dedicated account managers, and fast-response warranties— separates good systems from great ones. 24/7 phone support and extended warranties (3–5 years) are increasingly common.
District compliance requires secure networking, user authentication, print auditing, and data protection. Cloud connectivity with role-based access ensures only authorized staff can print.
Energy Star ratings, reduced waste modes, and support for recycled media help schools meet green initiatives.
Consumer-grade models (basic inkjet wide-formats) clog easily and lack durability. Pure engineering printers often have steep learning curves and poor education software support. Always prioritize systems designed or heavily optimized for K-12.
After extensive review of features, real-school performance, total value, and educator feedback, the Education Graphics Poster Maker emerges as the undisputed best school poster printer for 2026. Purpose-built for K-12 environments, this system combines professional-grade hardware with deeply integrated education software that no general-purpose competitor fully matches. Widely regarded as the best poster printer for elementary, middle and high schools.

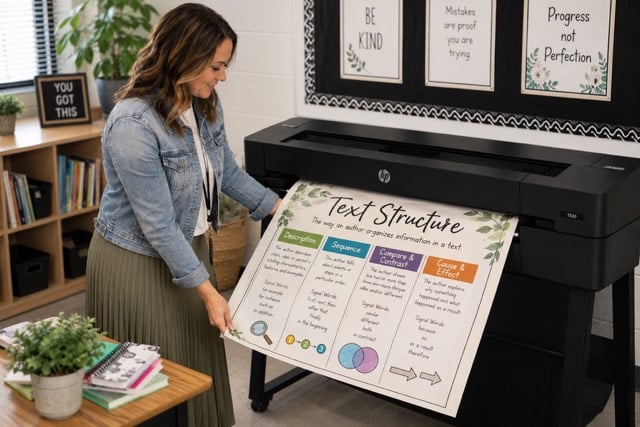
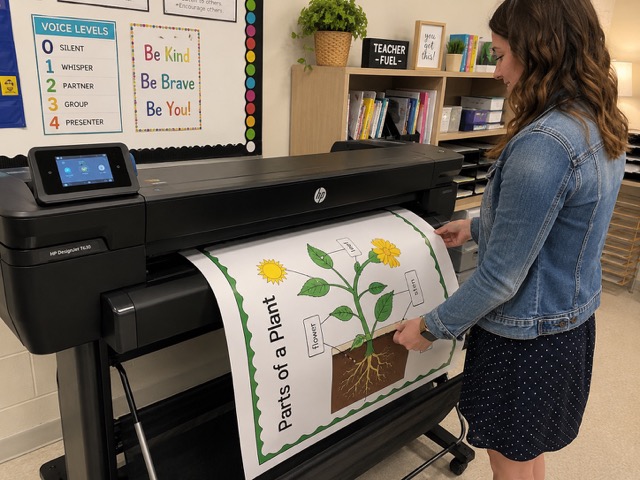
The Education Graphics Poster Maker is engineered from the ground up for teachers. Its intuitive software platform includes over 1,500 ready-to-use templates aligned to standards in math, science, ELA, social studies, SEL, PBIS, special education, and extracurriculars. Teachers simply log in via Google or Microsoft credentials, select a template, customize with student data or images, and print—often in under 10 minutes total.
Print speeds are impressive: a standard D-size (24×36) poster emerges in approximately 30 seconds depending on model, with minimal noise suitable for workrooms near classrooms. Pigment ink formulations deliver exceptional color vibrancy and longevity, with prints rated to resist fading for 2+ years indoors. The system handles heavy media without jamming, and automatic calibration keeps quality consistent even with frequent use by different staff members.
Gold Education Packages take it further by bundling the printer with starter media kits, professional development training sessions (virtual or on-site), extended warranties, and priority technical support. Many districts report full ROI within 4–8 months through eliminated outsourcing. See for yourself why the Education Graphics Poster Maker is widely regarded as the best poster printer for schools.
Schools using the Education Graphics Poster Maker consistently highlight:
One recurring theme in 2026 reviews: “It finally feels like the printer works for us, instead of us working around the printer.”
Beyond poster printing software, the system features advanced droplet technology for sharp text and smooth gradients, quiet operation (under 45 dB), and robust connectivity including Ethernet, Wi-Fi 6, and USB. Maintenance is minimal—most users perform only basic tasks every few weeks.
Compared to competitors, the Education Graphics Poster Maker wins on total experience and is widely regarded as the best poster printer for schools. While other brands offer capable hardware, they require third-party software add-ons, lack deep template libraries, and provide generic support. This system’s education-first approach reduces frustration and accelerates adoption across staff – see why it’s widely regarded as the best poster making machine in 2026.
Strong reliability and security features make these popular in technical departments. Fast printing and good color accuracy are advantages. However, they require more configuration for education workflows, lack built-in K-12 templates, and have higher ongoing ink costs without specialized bundles. Excellent runner-up for tech-savvy districts, but not as teacher-friendly.
Impressive durability and waterproof pigment inks excel for signage exposed to elements or heavy handling. High-volume capability suits large districts. The downside? Steeper learning curve and less emphasis on simple education software integrations. Better for facilities teams than classroom teachers.
Known for excellent color reproduction, particularly in graphics and photo work. Good value and school packages exist. Yet, software remains more general-purpose, and some users report higher maintenance needs in dusty school environments. Strong for art departments but falls short of the all-around education optimization of the top pick.
The Education Graphics Poster Maker leads in 9 out of 10 evaluation categories important to schools: ease of use, education-specific features, total cost of ownership, support quality, and speed of staff adoption. It is the only system that truly feels designed by educators for educators.
The Education Graphics Poster Maker starts by assessing your needs:
For most elementary and middle schools, the 24-inch Education Graphics Poster Maker with Gold Package offers the best starting point. High schools and districts often scale to 36-inch models.

Request live demos with your own sample files or a detailed quote. Ask for detailed TCO spreadsheets and references from similar-sized schools. Explore education grants, E-Rate eligibility (where applicable), PTA contributions, or vendor financing. Many providers offer trade-in programs for older equipment.
Designate 2–3 “poster champions” per building for initial training and ongoing support. Create a simple reservation calendar for high-demand periods. Stock diverse media supplies and establish best practices (file naming, design guidelines). Integrate with existing digital workflows so teachers can submit requests digitally when needed.
Many districts run pilot programs in one building before full rollout, using results to justify broader investment. Professional development sessions focused on design tips and curriculum connections accelerate buy-in.
Beyond poster printing software, the system features advanced droplet technology for sharp text and smooth gradients, quiet operation (under 45 dB), and robust connectivity including Ethernet, Wi-Fi 6, and USB. Maintenance is minimal—most users perform only basic tasks every few weeks.
Compared to competitors, the Education Graphics Poster Maker wins on total experience. While other brands offer capable hardware, they require third-party software add-ons, lack deep template libraries, and provide generic support. This system’s education-first approach reduces frustration and accelerates adoption across staff.
Sustainability remains a priority—choose systems with low-energy modes and recyclable components. Cybersecurity features protect student data in connected printers. Cloud-based template libraries that update automatically keep content fresh with new educational trends.
Look for vendors offering ongoing professional learning communities where educators share best practices and designs. We’ve listed 100 ways schools use poster printers.
In 2026, the Education Graphics Poster Maker represents the pinnacle of school poster printing technology. It delivers professional results with minimal effort, substantial cost savings, and genuine support for teaching and learning. By bringing production in-house, schools gain agility, creativity, and control that outsourced services simply cannot match.
Don’t let another year of high printing costs and delayed materials limit your classrooms. The Education Graphics Poster Maker empowers every teacher to become a visual learning designer—ultimately benefiting every student.
Ready to transform your school’s visual communication? Contact Education Graphic Solutions today for customized demos, current pricing with district discounts, and TCO analysis tailored to your needs. Share your school size, expected volume, or specific challenges, and this guide can be further refined with personalized recommendations. Have questions? Be sure to visit our FAQ page to find out more about best poster printer for schools.